Groups & permissions
Groups are how MACHHUB grants access. Each group holds a set of permissions, and users inherit the permissions of every group they belong to. Manage them under Account → Groups.
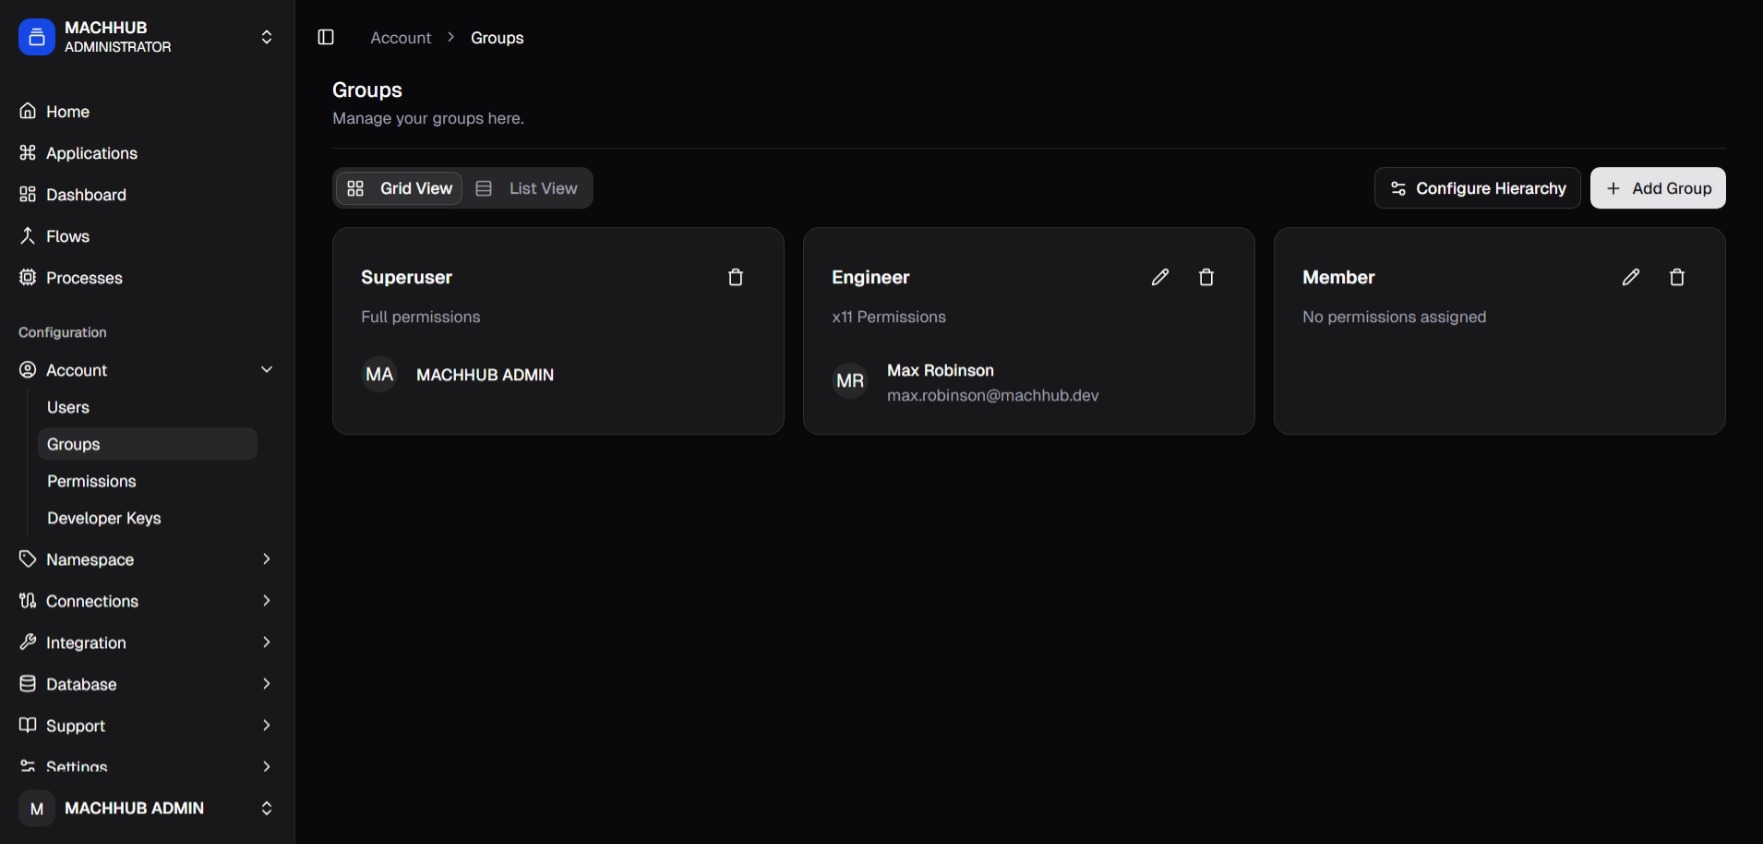
/account/groups) — permission cards.Create a group
Section titled “Create a group”- Click Add Group.
- Give it a Group Name (the names
SuperuserandMemberare reserved). - Set permissions. Each feature has an access-level dropdown — pick No Access,
Read, or Read and Write. (
read-writeallows both reading and writing.) - Save.
Permissions are organized into three collapsible sections. Each section header has a Set All … control to apply one level to every feature in it at once.
Global permissions
Section titled “Global permissions”Platform-wide features (apply across all of MACHHUB):
| Feature | Covers |
|---|---|
| Applications | View / manage all applications in MACHHUB. |
| Logs | View / manage system logs. |
| General Settings | View / manage general system settings. |
| Gateway Settings | View / manage gateway settings. |
| License | View / manage MACHHUB licensing. |
| Integrations | View / manage MACHHUB integrations. |
Domain permissions
Section titled “Domain permissions”Per-domain features (scoped to the active domain):
| Feature | Covers |
|---|---|
| Users | View / manage user accounts in this domain. |
| Groups | View / manage user groups in this domain. |
| Upstreams | View / manage upstream configurations. |
| Manage Namespace | View / manage namespaces in this domain. |
| Historian | View / manage historian data in this domain. |
| Collections | View / manage collections in this domain. |
| Dashboard | View / manage dashboards in this domain. |
| Flows | View / manage flows in this domain. |
User-defined permissions
Section titled “User-defined permissions”Custom features you create on the Permissions page. A fresh install has none — the section reads “No user-defined features available. Create them in the Permissions page first.”
Once you’ve added features (e.g. company_profile, contacts), each appears here with
a + Add rules dropdown instead of a single access level. A rule is an
action:scope pair built from the feature’s custom actions and the domain’s
scopes — for example read:all, read:self, update:all, or update:self. Add as
many rules as the group needs.
See Authorization & Permissions and Permission JSON to define and import features, actions, and scopes.

How it maps to the model
Section titled “How it maps to the model”flowchart LR G["Group"] -->|grants| P["Read / Read and Write\non each feature"] U["User"] -->|member of| G U -->|effective access| P
For global and domain features, each cell is an access level — No Access,
Read (read), or Read and Write (read-write) — on that feature. User-defined
features work differently: you add action:scope rules instead (see above). See
Authorization & Permissions for the full model.
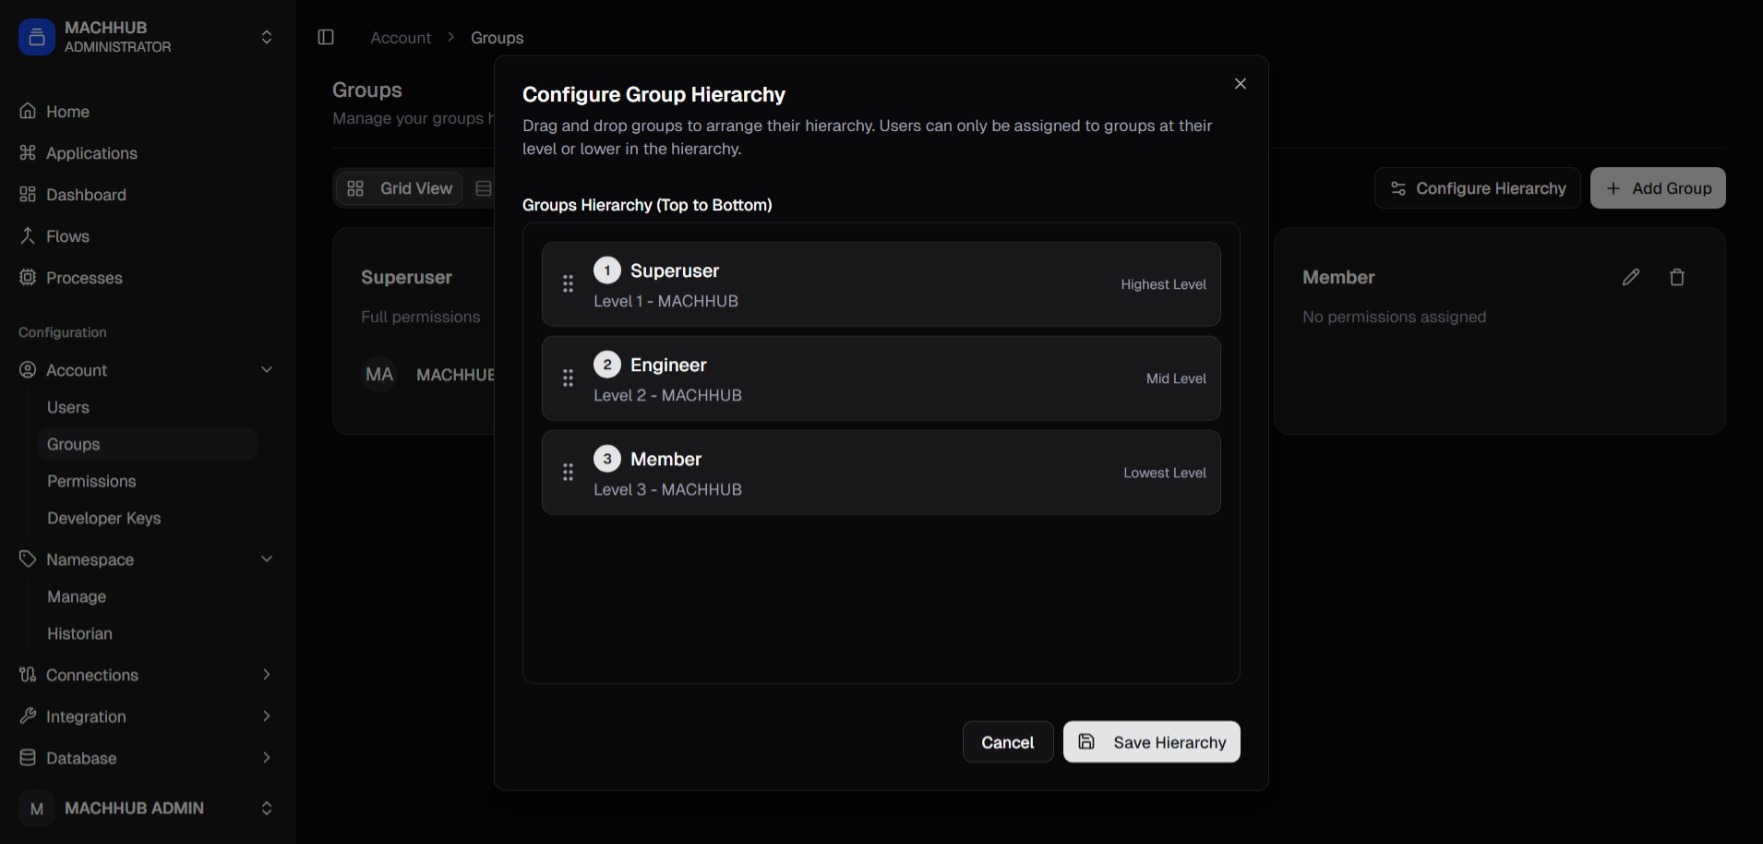
Group hierarchy
Section titled “Group hierarchy”Click Configure Hierarchy to order your groups top-to-bottom by level (drag and drop). A user can only be assigned to groups at their own level or lower in the hierarchy. The built-in groups anchor the ends: Superuser is the highest level and Member is the lowest.
Hierarchy also sets priority: when a user belongs to multiple groups in the same domain, the higher-level group’s permissions take precedence over the lower-level group’s where they conflict.
Reserved groups
Section titled “Reserved groups”- Superuser — full access; bypasses all permission checks. Assign with care.
- Member — the baseline group, with no permissions assigned by default.