MACHHUB Designer (VS Code)
MACHHUB Designer is the official Visual Studio Code extension for MACHHUB application developers. It connects VS Code to a MACHHUB Platform server (local or remote) — the active connection is your MACHHUB Environment — and gives you an in-editor workflow to develop, build, and deploy applications against it.
Get it from the
Visual Studio Marketplace
— extension ID machhub.machhub-designer.
What it does
Section titled “What it does”flowchart LR
subgraph VS["VS Code"]
Sidebar["Designer sidebar\n(source + builds + deploy)"]
Ext["MACHHUB Designer\nproxy server"]
end
DevServer["Your dev server\n(SDK requests)"] -- "sdk.Initialize() (no args)" --> Ext
Ext -- "proxies SDK traffic" --> EDGE["Connected MACHHUB Platform\n(MACHHUB Environment)"]
Sidebar -- "deploy project" --> EDGE
- Remote platform connection. Connect VS Code to a MACHHUB Platform server (local or remote), authenticating with a Developer Key; the connected server is your active MACHHUB Environment.
- Source & build sidebar. A sidebar segments your project’s source and builds and lets you deploy the project to the connected platform without leaving the editor.
- Dev-server proxy. The extension proxies your dev server’s SDK requests to the
connected platform, so
await sdk.Initialize()works with no connection config in development. In production the app is hosted on the MACHHUB Platform, so the SDK resolves its connection from the host — manual config is only for self-hosting, a different server/domain, or hardcoding.
Connection configuration
Section titled “Connection configuration”The MACHHUB Runtime Connection panel is where you configure and switch environments. A status badge (Connected / disconnected) shows the current state.
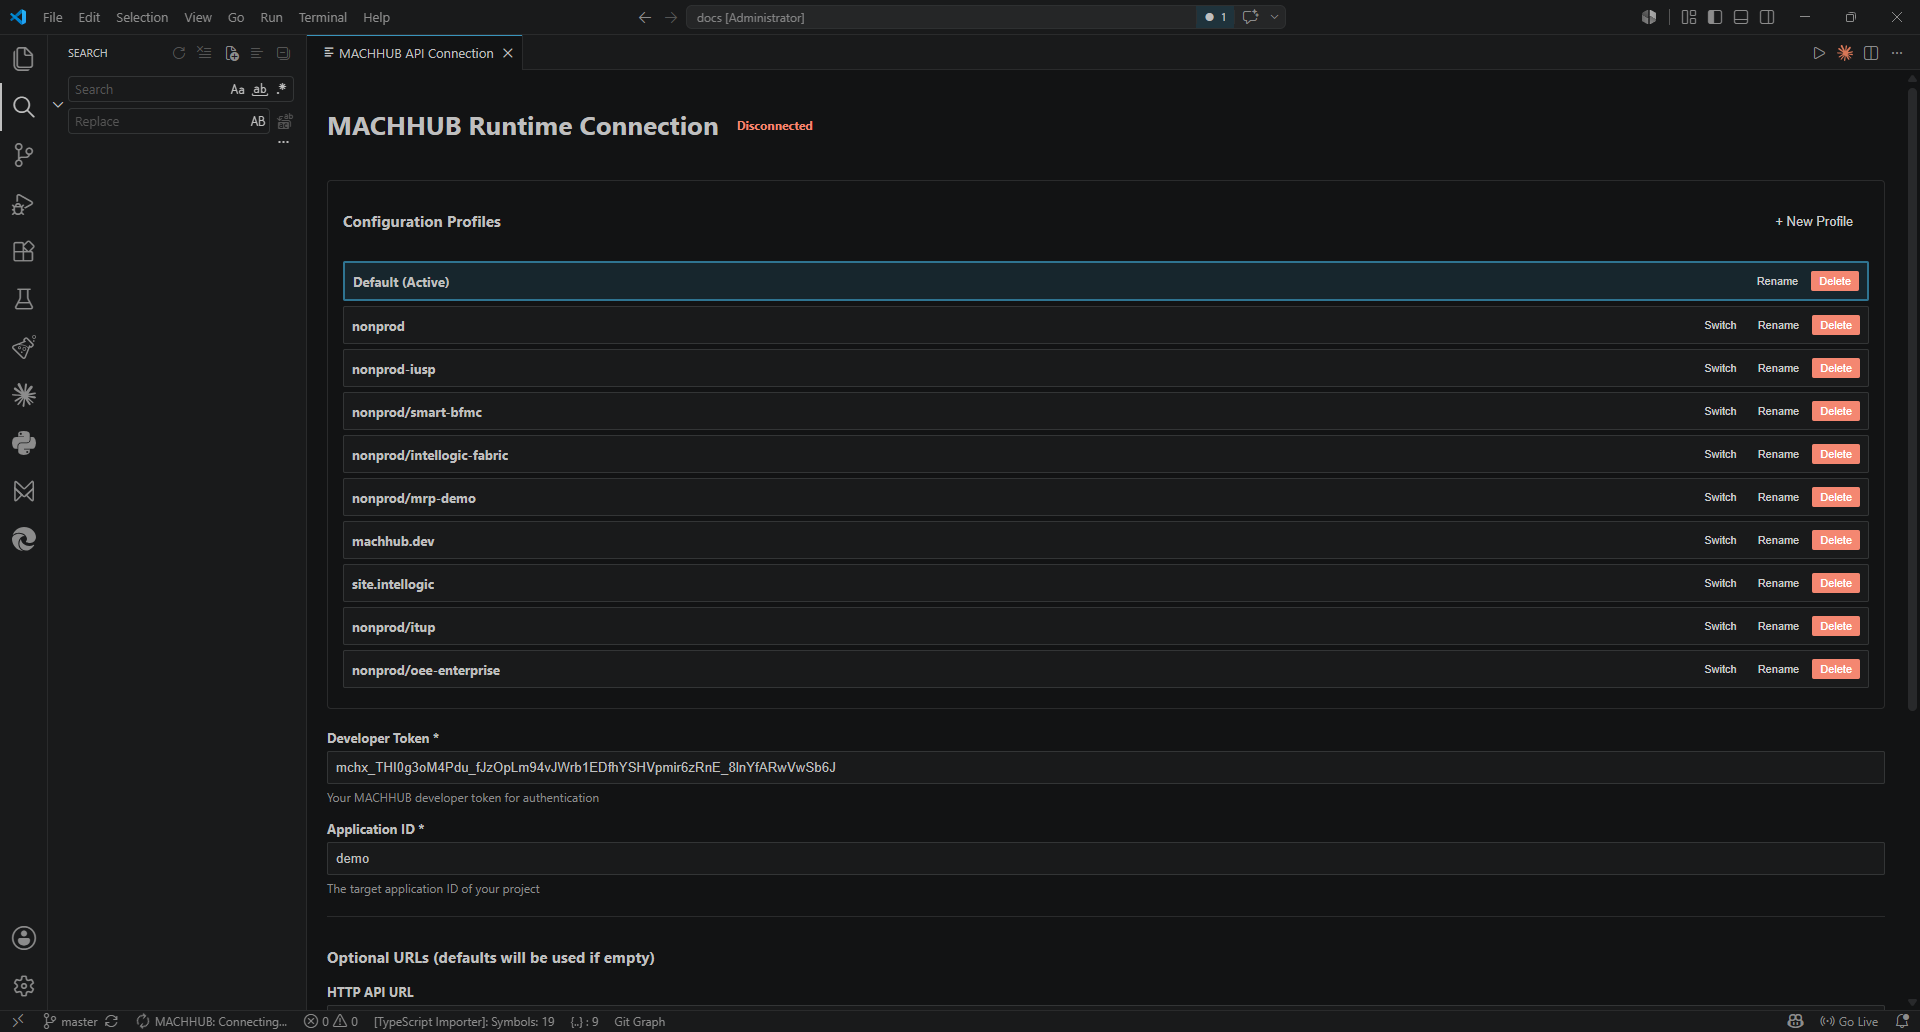
Configuration Profiles
Section titled “Configuration Profiles”Each profile is a saved connection. The list supports + New Profile, and per
row: Switch (make it active), Rename, and Delete. The active profile is
marked (Active). Use profiles to keep separate setups (e.g. nonprod,
nonprod/oee-enterprise, site.intellogic) and switch between them.
Connection fields
Section titled “Connection fields”| Field | Required | Notes |
|---|---|---|
| Developer Token | yes | A Developer Key (mchx_…) used to authenticate. |
| Application ID | yes | Target application ID of your project (e.g. oee_enterprise). |
| HTTP API URL | no | Defaults to http://localhost:6188. |
| MQTT URL | no | Defaults to ws://localhost:180. |
| Build Folder Path | no | Build output folder, relative to workspace root. Defaults to build. |
The URLs are optional — leave them empty to use the defaults. Actions:
- Save & Connect — save the profile and connect.
- Test Connection — verify the settings without switching.
- Disconnect — drop the active connection.
Development Server Logs
Section titled “Development Server Logs”The panel also exposes the dev server’s logs: View Logs, Clear Logs, Refresh, and Restart Server.
Install
Section titled “Install”- Open the Extensions view in VS Code.
- Search for MACHHUB Designer (extension ID
machhub.machhub-designer), or install it from the Marketplace listing. - Install it, then reload VS Code.

sdk.Initialize() is proxied to the connected platform.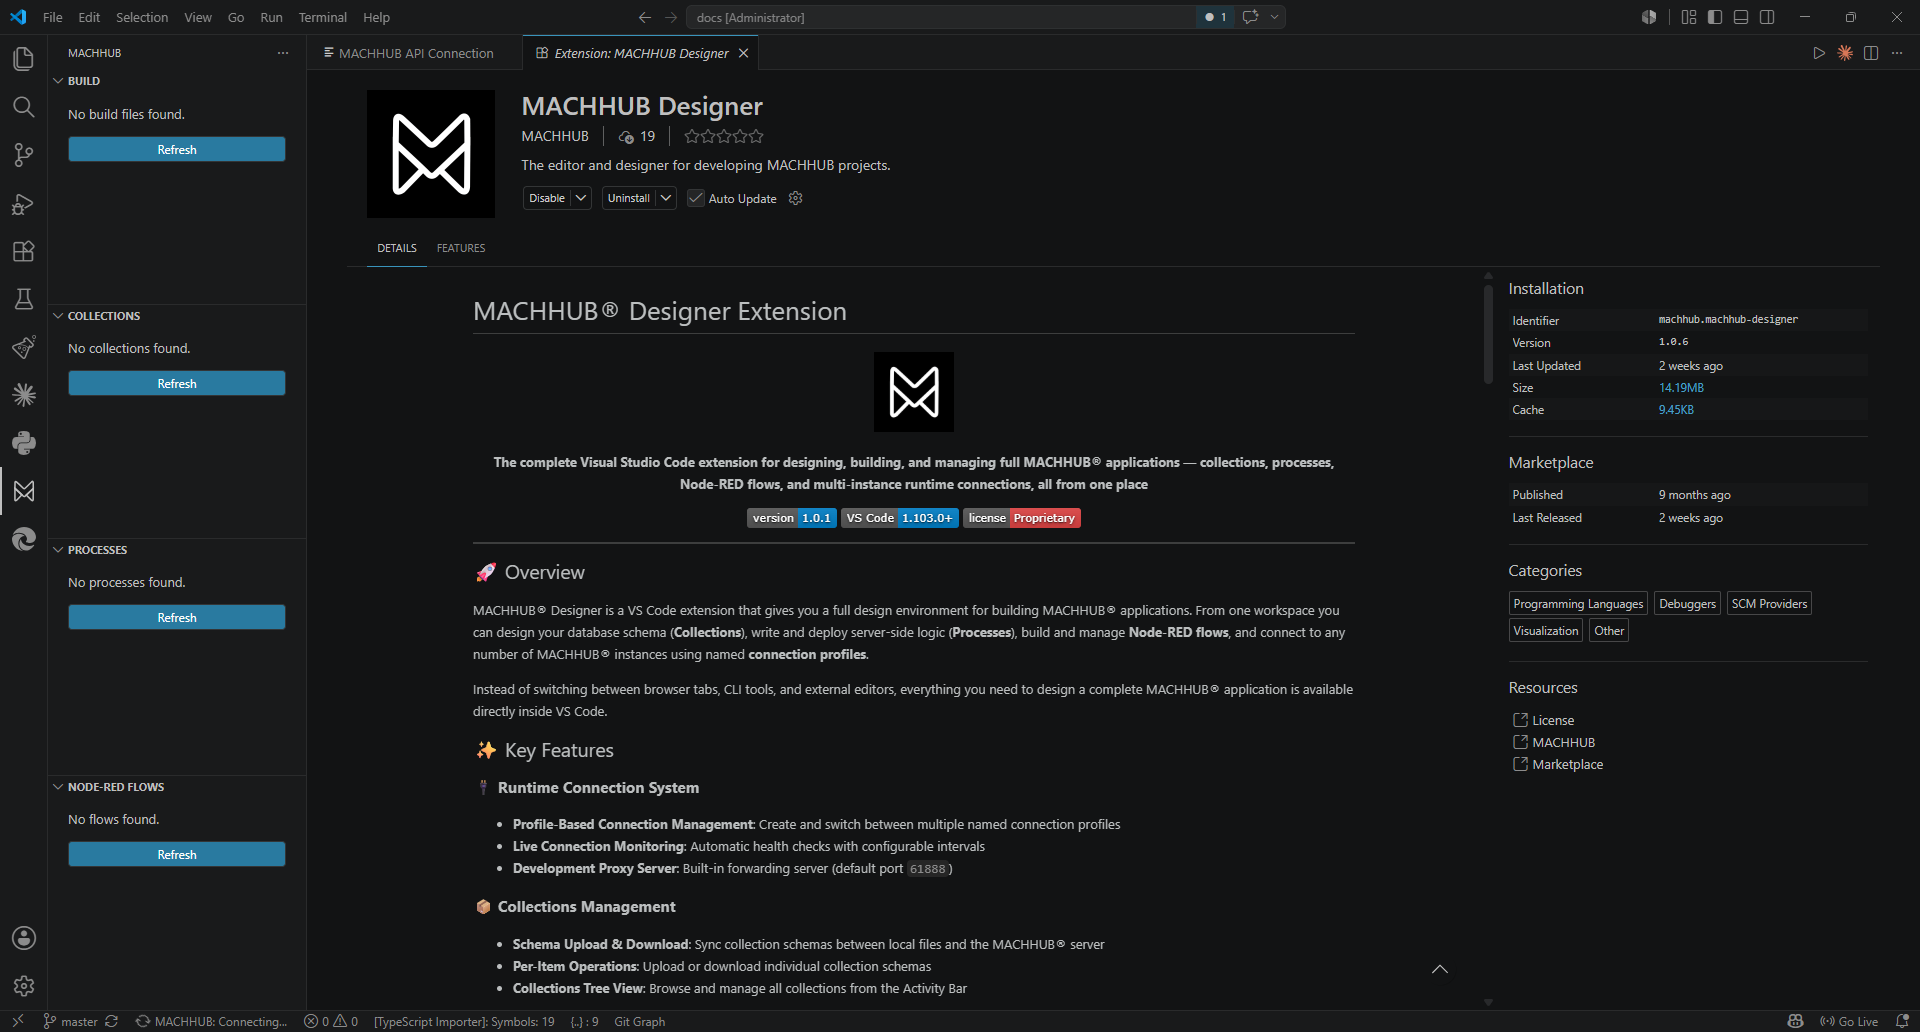
Typical workflow
Section titled “Typical workflow”- Install the extension and open your app project.
- (Optional) For AI-assisted development (Claude Code, GitHub Copilot, Antigravity
AI, or Cursor), clone the
@machhub-dev/skillsrepo and place the skill folders where your assistant looks for them — see AI Agent Skills. - Connect the Designer to your MACHHUB Platform server, authenticating with a Developer Key — this becomes your active MACHHUB Environment. The proxy uses that key for all SDK traffic it forwards.
- Install the SDK:
npm install @machhub-dev/sdk-ts. - Initialize with zero-config:
await sdk.Initialize();— the Designer proxy routes your dev server’s SDK requests to the connected platform. - Build your app using the SDK and your framework guide.
- Deploy your project to MACHHUB from the Designer sidebar.
Commands
Section titled “Commands”Run these from the VS Code Command Palette (Ctrl/Cmd + Shift + P):
| Command | What it does |
|---|---|
| MACHHUB: Configure API Connection | Open the Runtime Connection panel (profiles, token, URLs). |
| MACHHUB: Restart Extension Server | Restart the Designer’s local dev/proxy server. |
| MACHHUB: Focus on Build View | Reveal the Build view. |
| MACHHUB: Focus on Collections View | Reveal the Collections view. |
| MACHHUB: Focus on Processes View | Reveal the Processes view. |
| MACHHUB: Focus on NODE-RED Flows View | Reveal the Node-RED Flows view. |
| View: Show MACHHUB | Show the MACHHUB sidebar container. |
| View: Toggle MACHHUB ATTRIBUTES Deprecated | Toggle the Attributes view. |
| View: Toggle MACHHUB Flow Palette Deprecated | Toggle the Flow Palette view. |
For anything not listed here, see the Marketplace listing.
See also
Section titled “See also”- Install & initialize the SDK
- Authoring Processes
- AI Agent Skills — the Designer pairs with editor AI skills for even faster scaffolding.